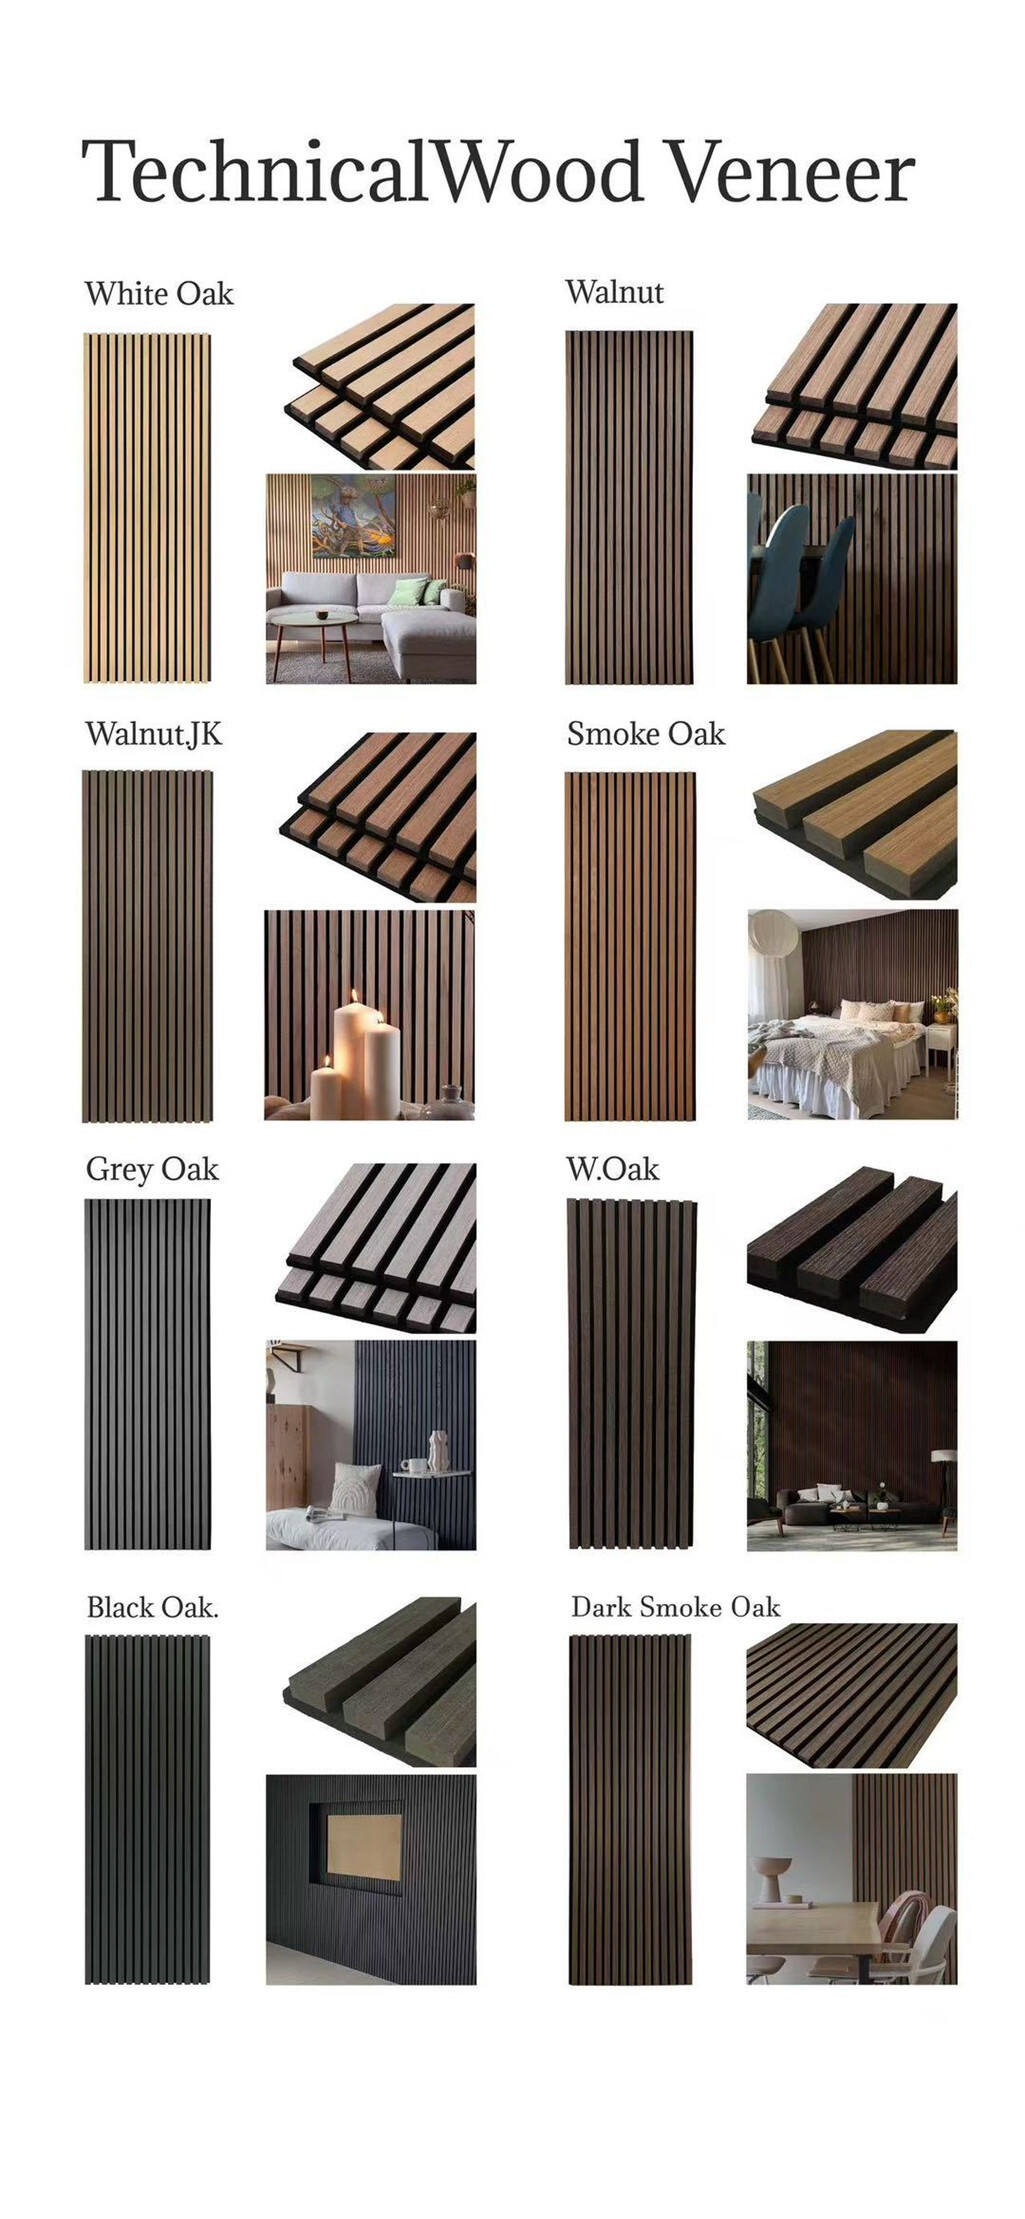

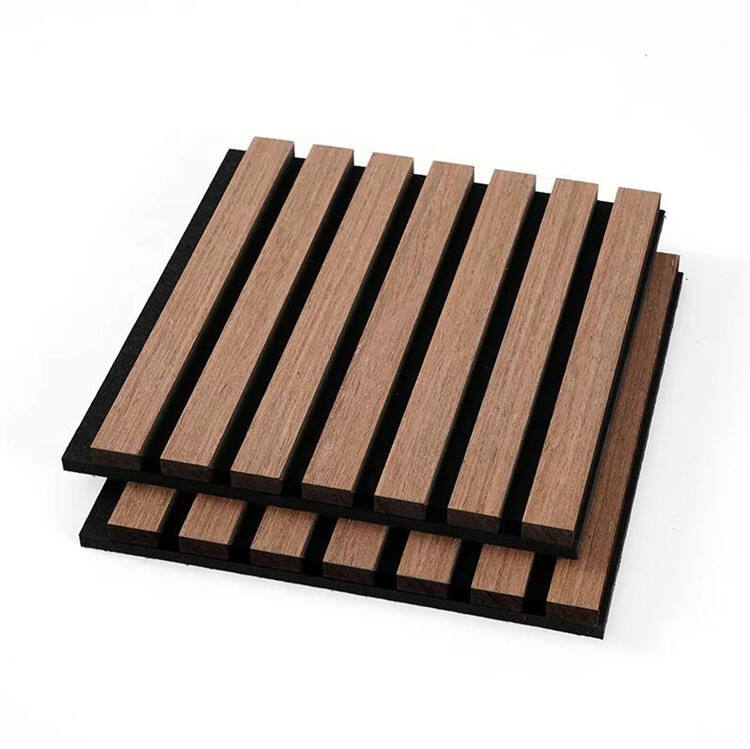
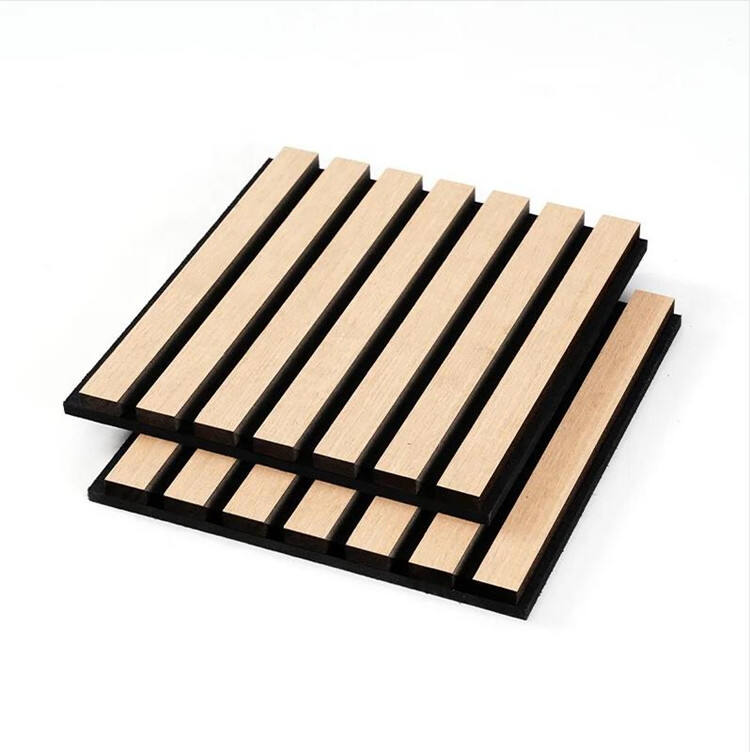
Wooden Slat Acoustic Panel YZWS-003
|
Height: |
2.4m 、2.6m、3m |
|
Width: |
400mm、600mm |
|
Depth: |
20mm、22mm |
|
Colour: |
Natural Wood |
|
Texture: |
Natural Wood Grain |
|
Finish |
Wood Veneer |
- Overview
- Recommended Products
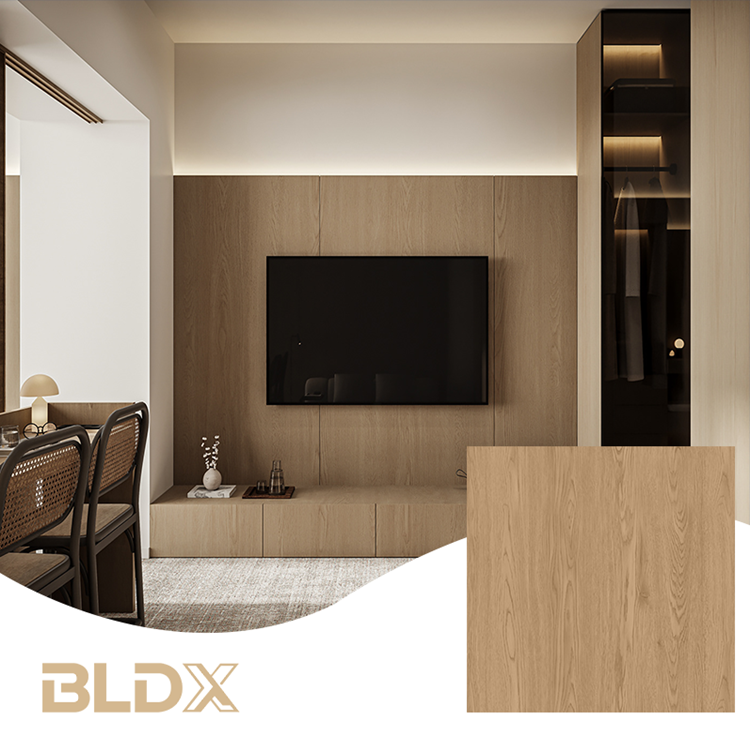
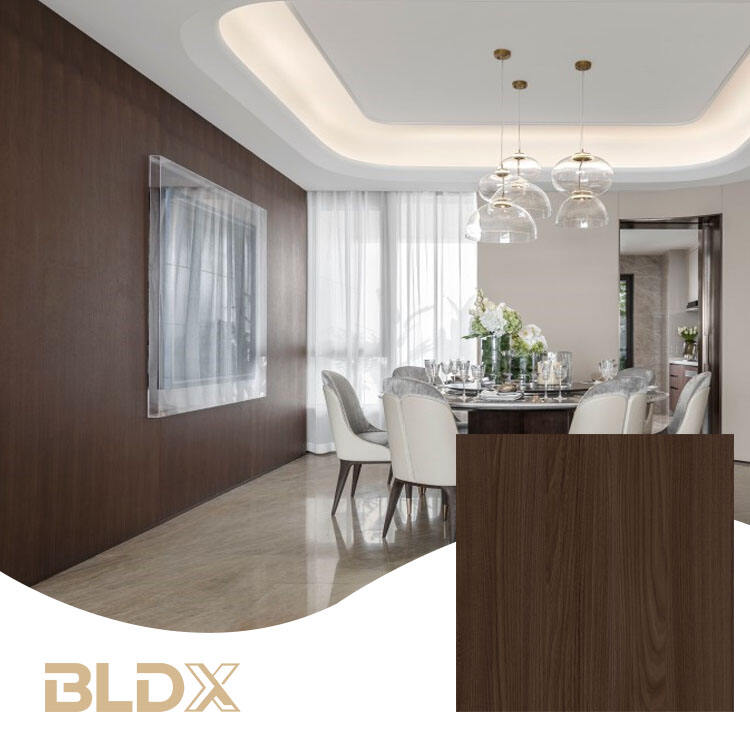
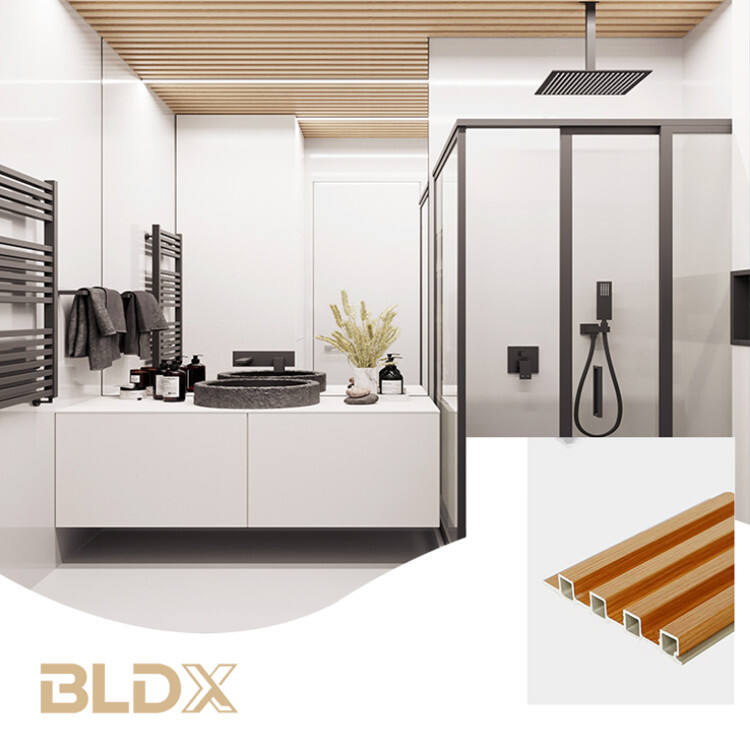
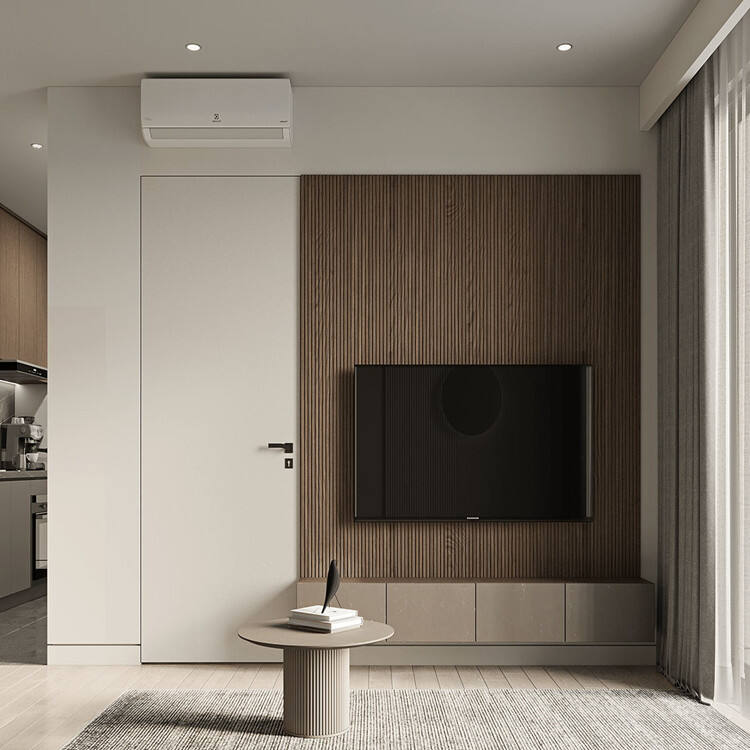
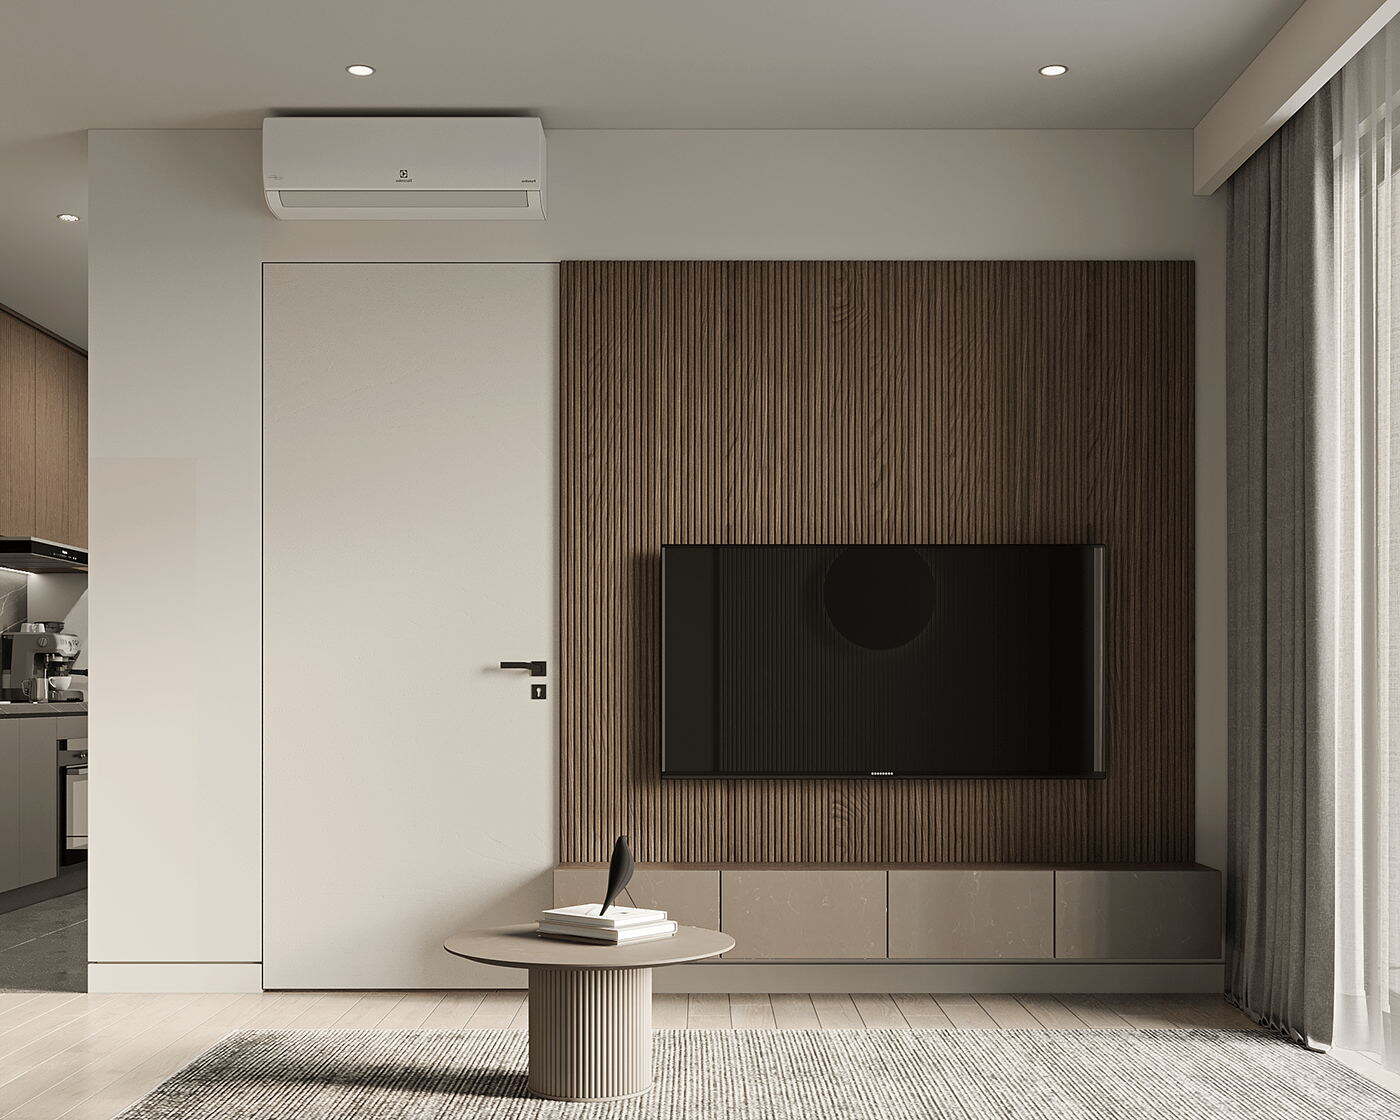
The wooden slat acoustic panels not only enhance the visual appeal but also create a quieter and more comfortable environment, achieving the perfect balance and harmony for any home or office.
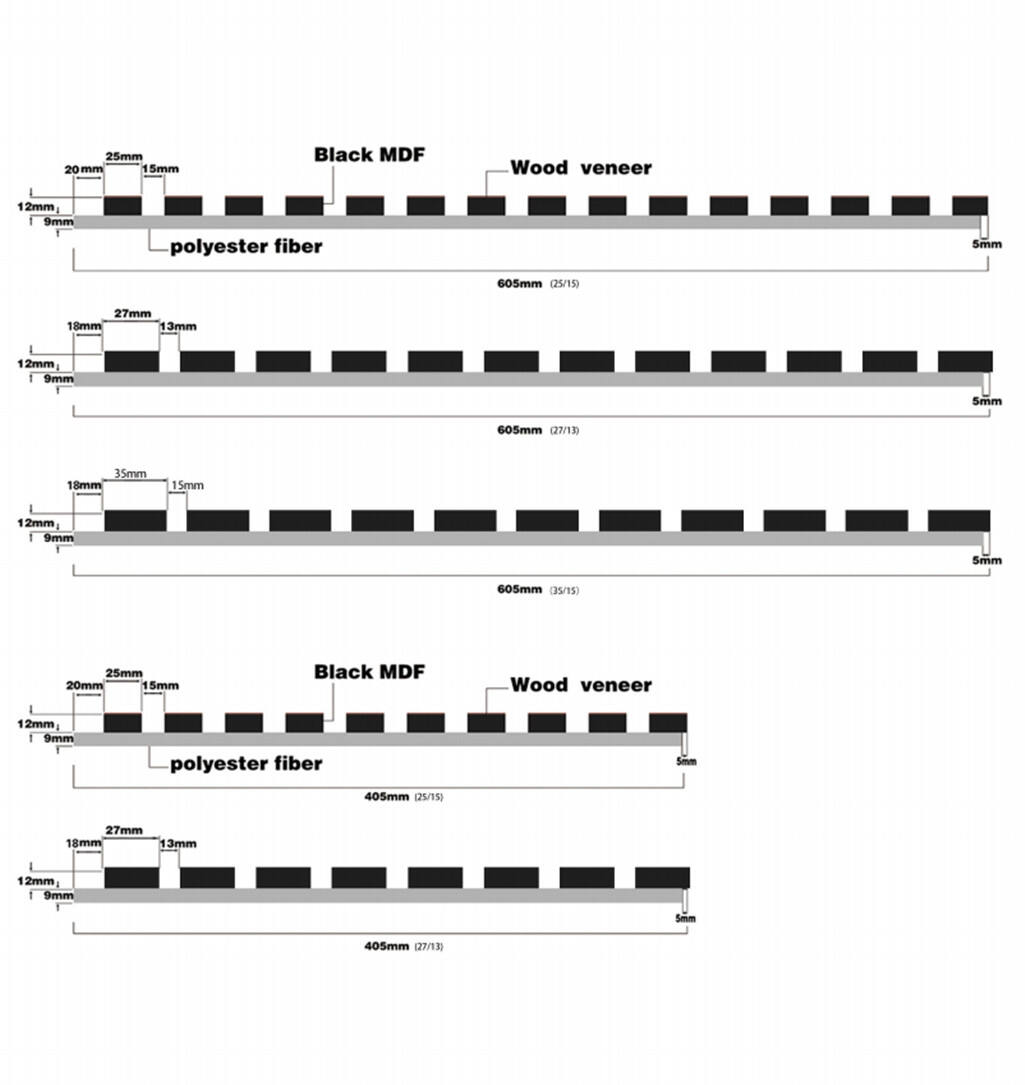
Specifications:
Product Specification | |
Height |
2.4m、2.6m、3m |
Width |
400mm、600mm |
Depth |
20mm、22mm |
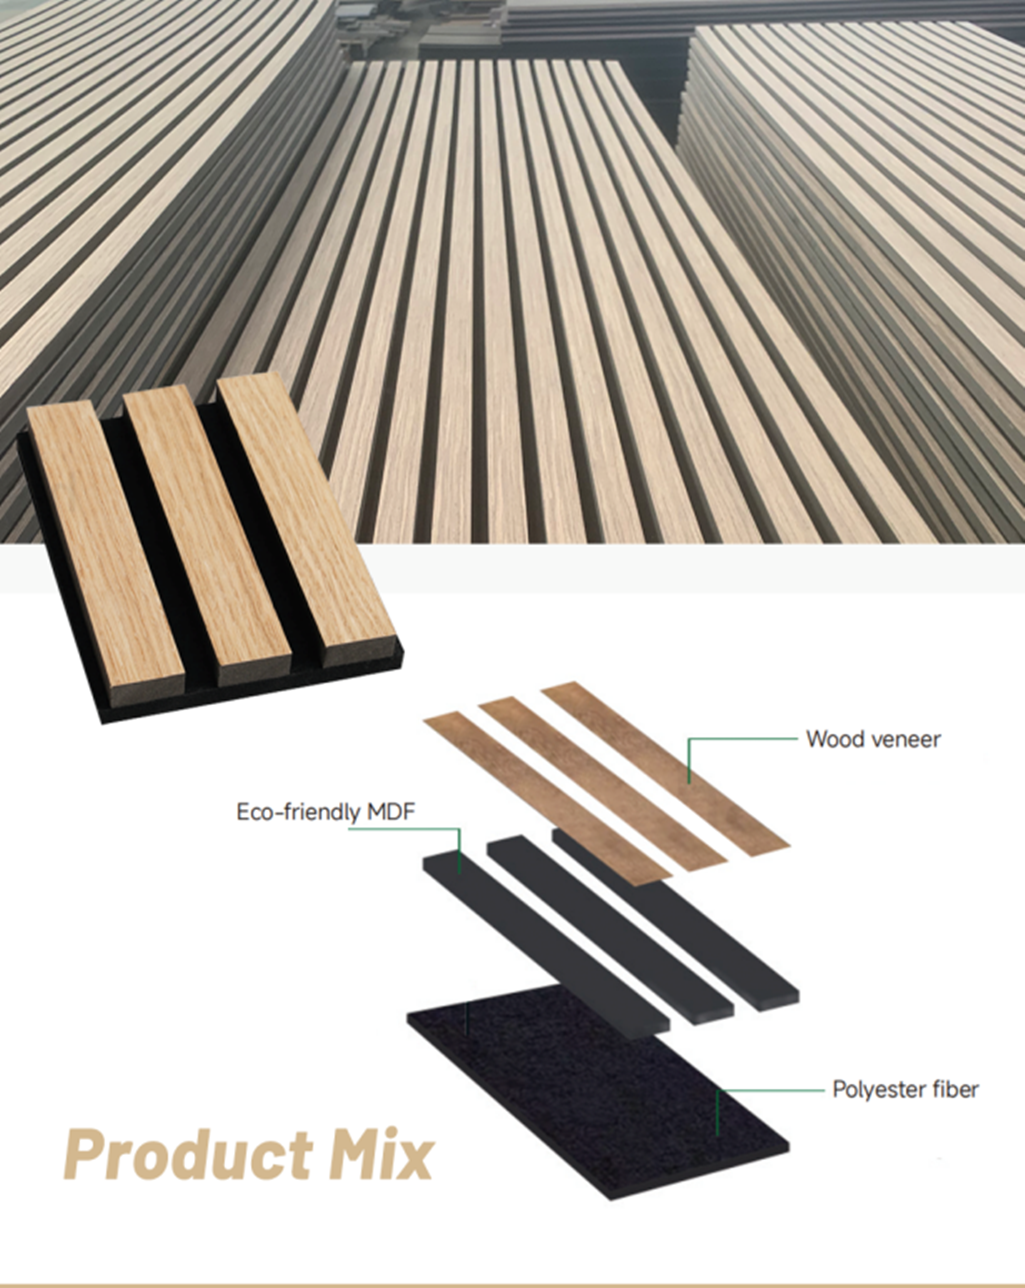
Material |
MDF board & PET fibe |
Colour |
Natural Wood |
Texture |
Natural Wood Grain |
Finish |
Wood Veneer |
Installation |
Internal Walls |
Clean |
Clean with a vacuum cleaner or a dry cloth, not with water |
Additional Info |
Residential & Commercial Use |
Competitive Advantage:
Wooden slat acoustic panel
Features & Benefits:
1、Acoustic Performance-Acoustic felt can reduce noise and minimize unwanted reverberation.
2、Rich in color and shape-Versatile woodgrain colors and finishes to appeal to any style of home or office
3、Multifunctional Design-Suitable for walls, ceilings, and any room requiring acoustic treatment.
4、Easy Installation-Lightweight design ensures easy fitting to walls and ceilings.
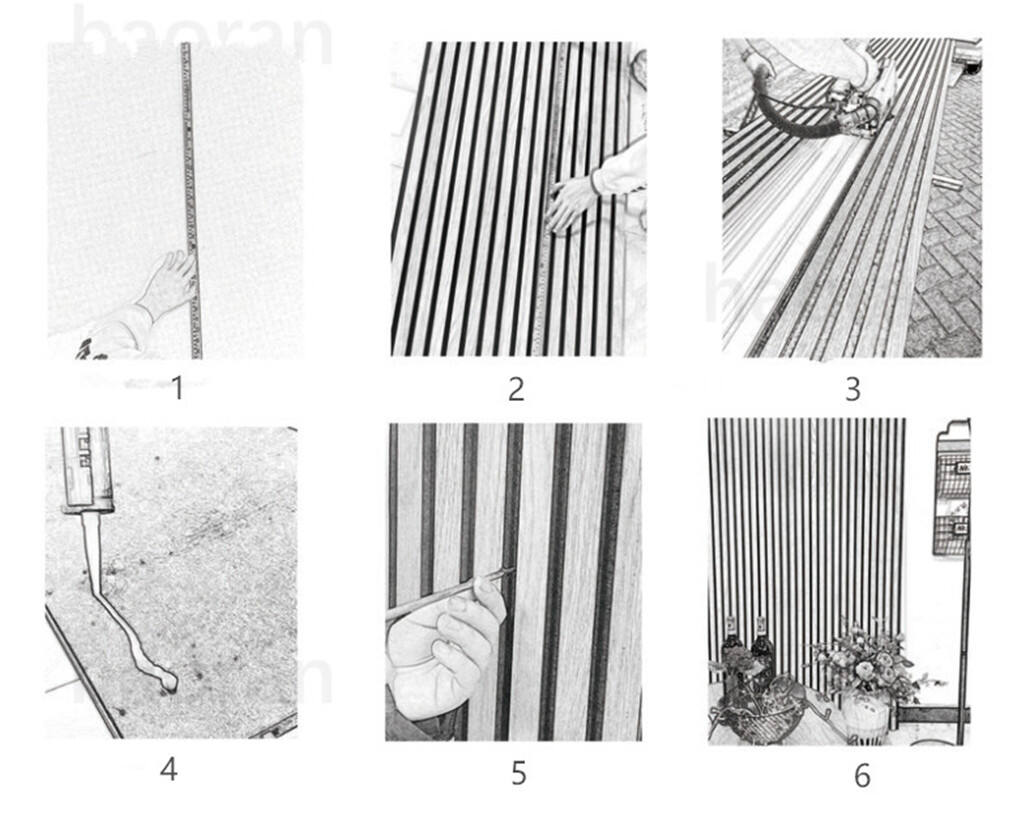
How to install wooden slat acoustic panel
1. Direction
Acoustic panels can be arranged either horizontally or vertically. Determine the best orientation for your project.
2. Measure the Panels
Measure the length and width of the ceiling/wall to determine how many acoustic panels are needed.
3. Cutting the Panels
Use a saw or sharp scissors to cut the panels, and always wear gloves and safety goggles.
4. Applying Adhesive
Spread adhesive evenly on the back of the panel for proper bonding.
5. Start Installation
Based on your chosen direction, begin installing the panels from left to right or bottom to top, securing them with a nail gun.
6. Completion
By following these steps, your installation is now complete.